Sewing and lifestyle blog of a wannabe "full-time vixen"

The Saltspring Dress

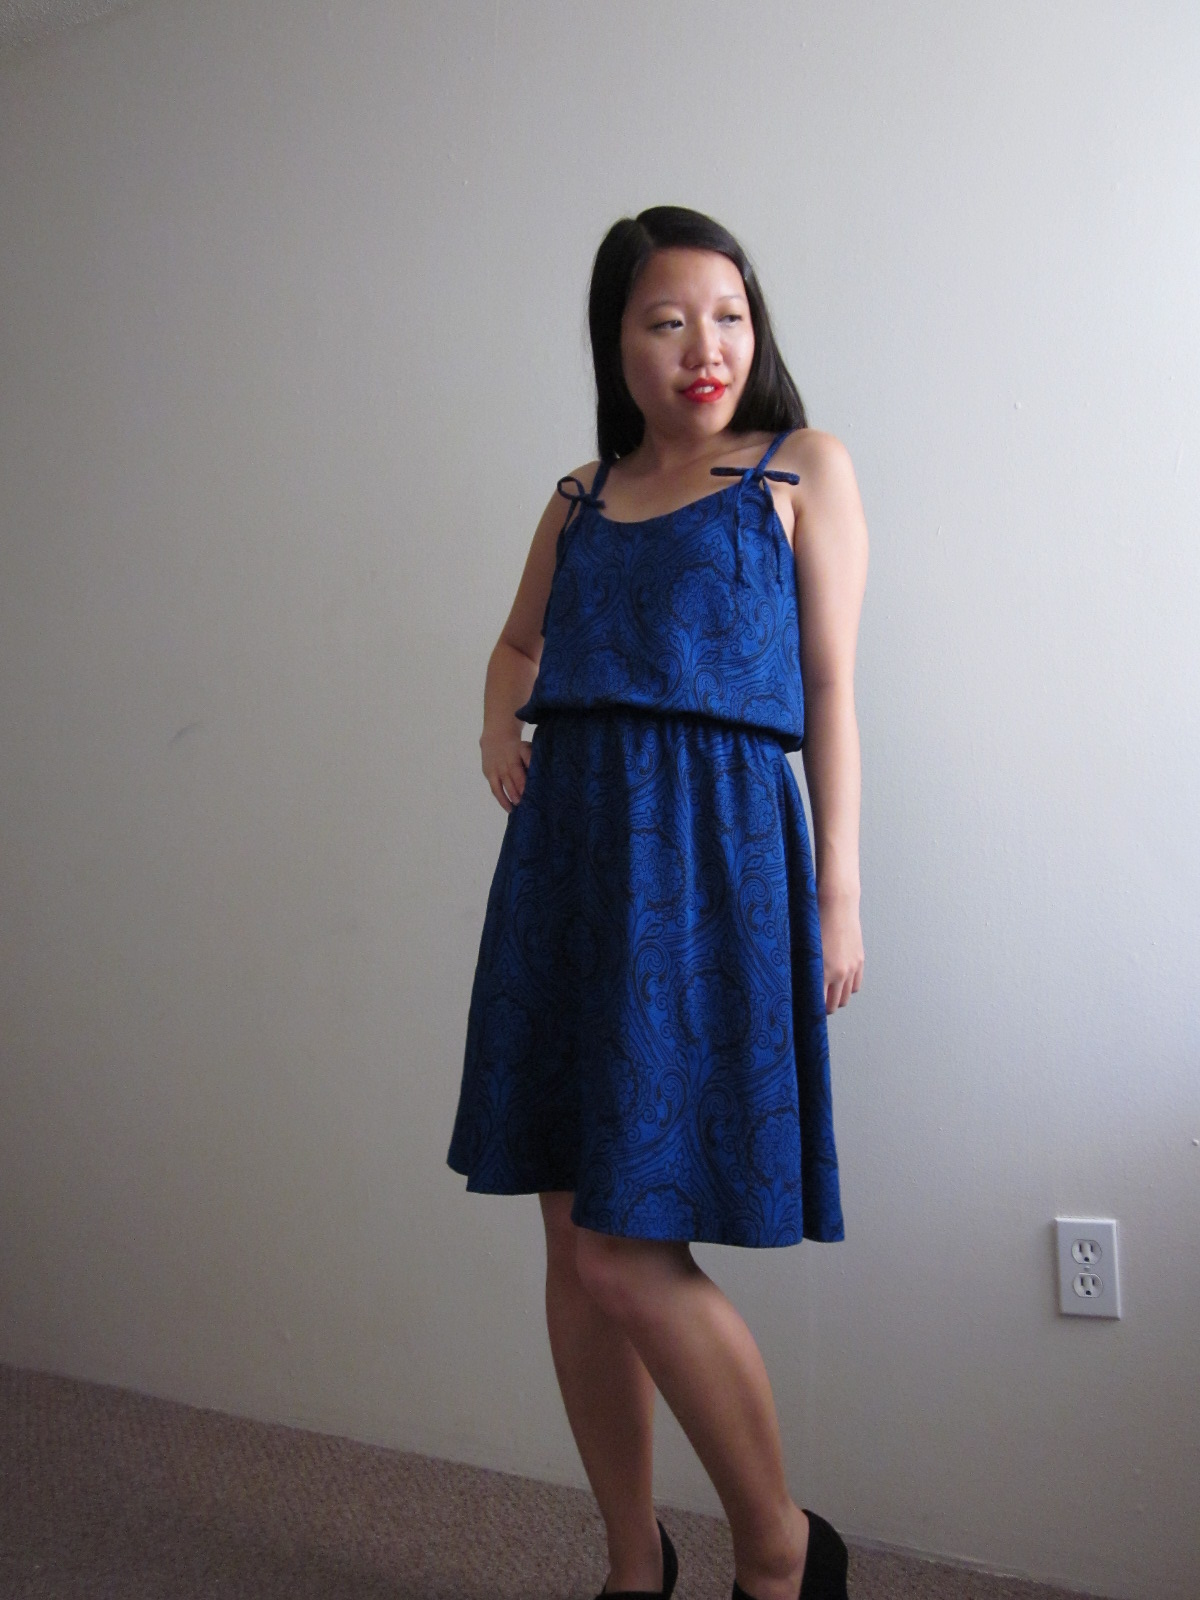
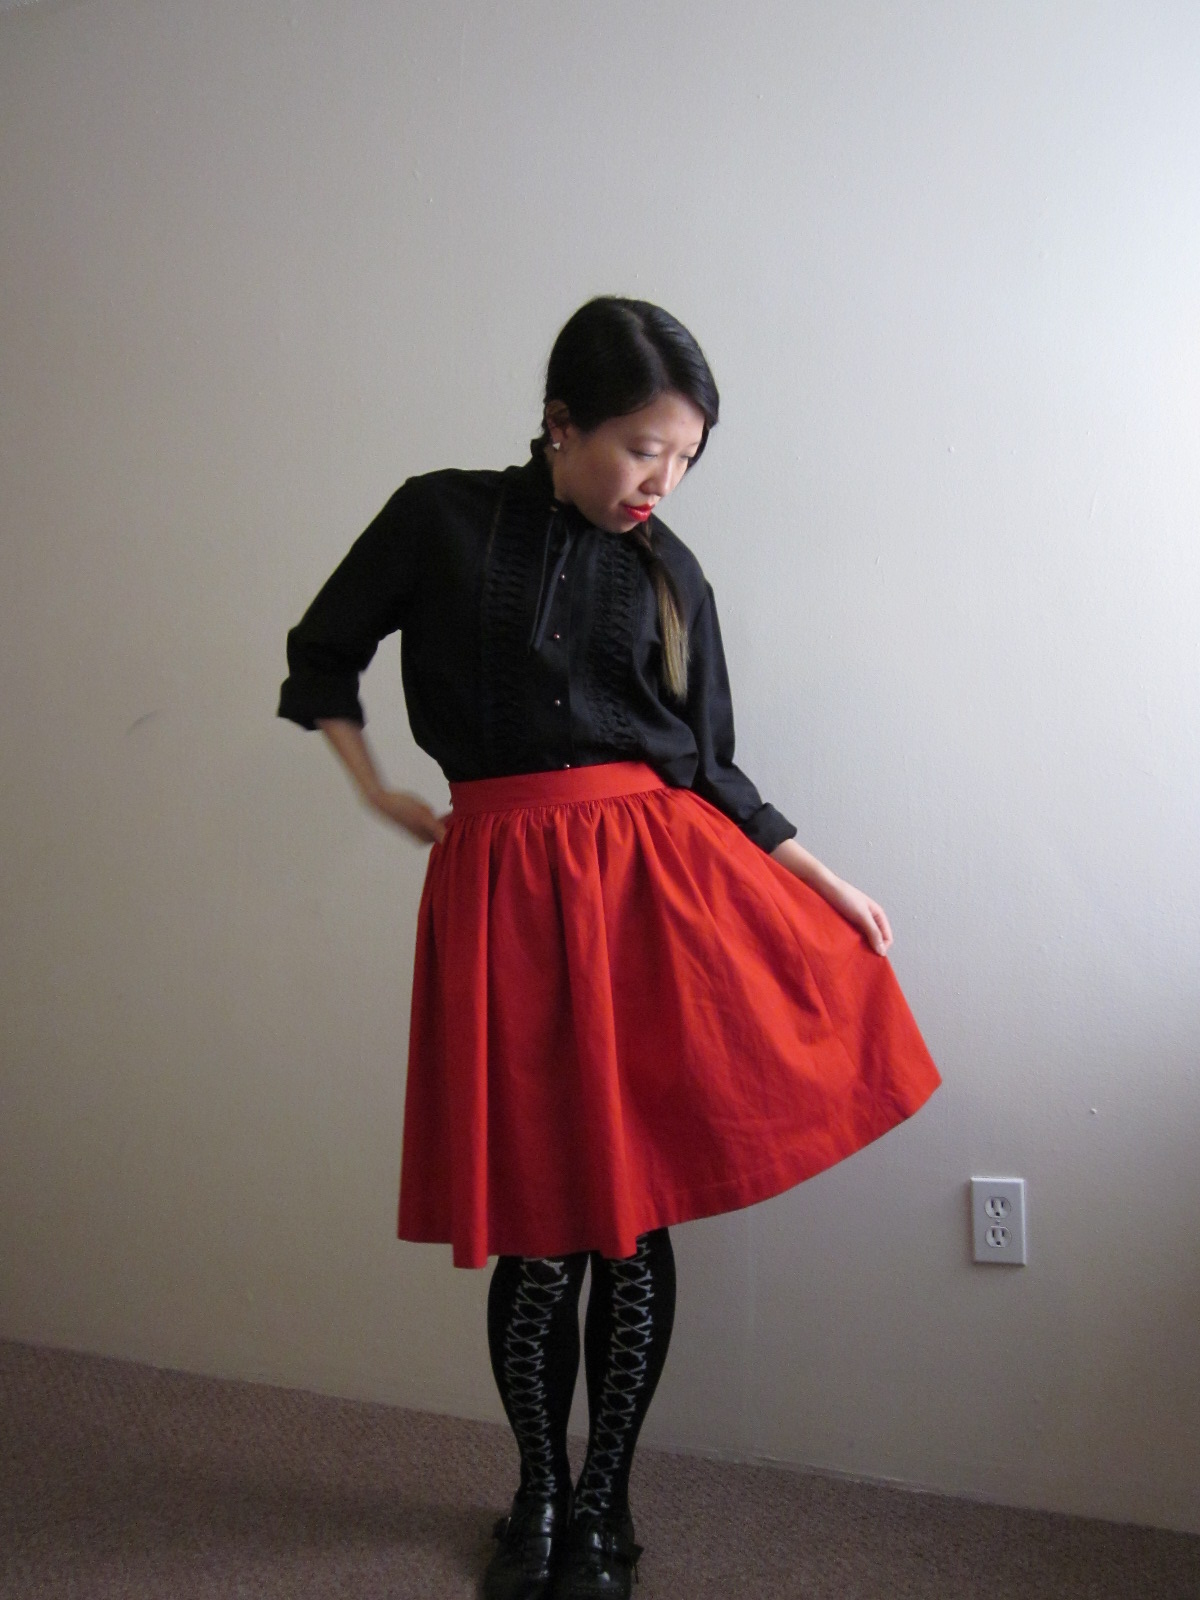
I was participating in the Saltspring Dress Sewalong held over at the Sewaholic website. I completed it this weekend, take a look!


This pattern is perfectly drafted. I made no alterations and cut a straight size 4. It fits amazingly in the bodice! This is the third time I’ve sewn a Sewholic pattern and all times I’ve never made adjustments.

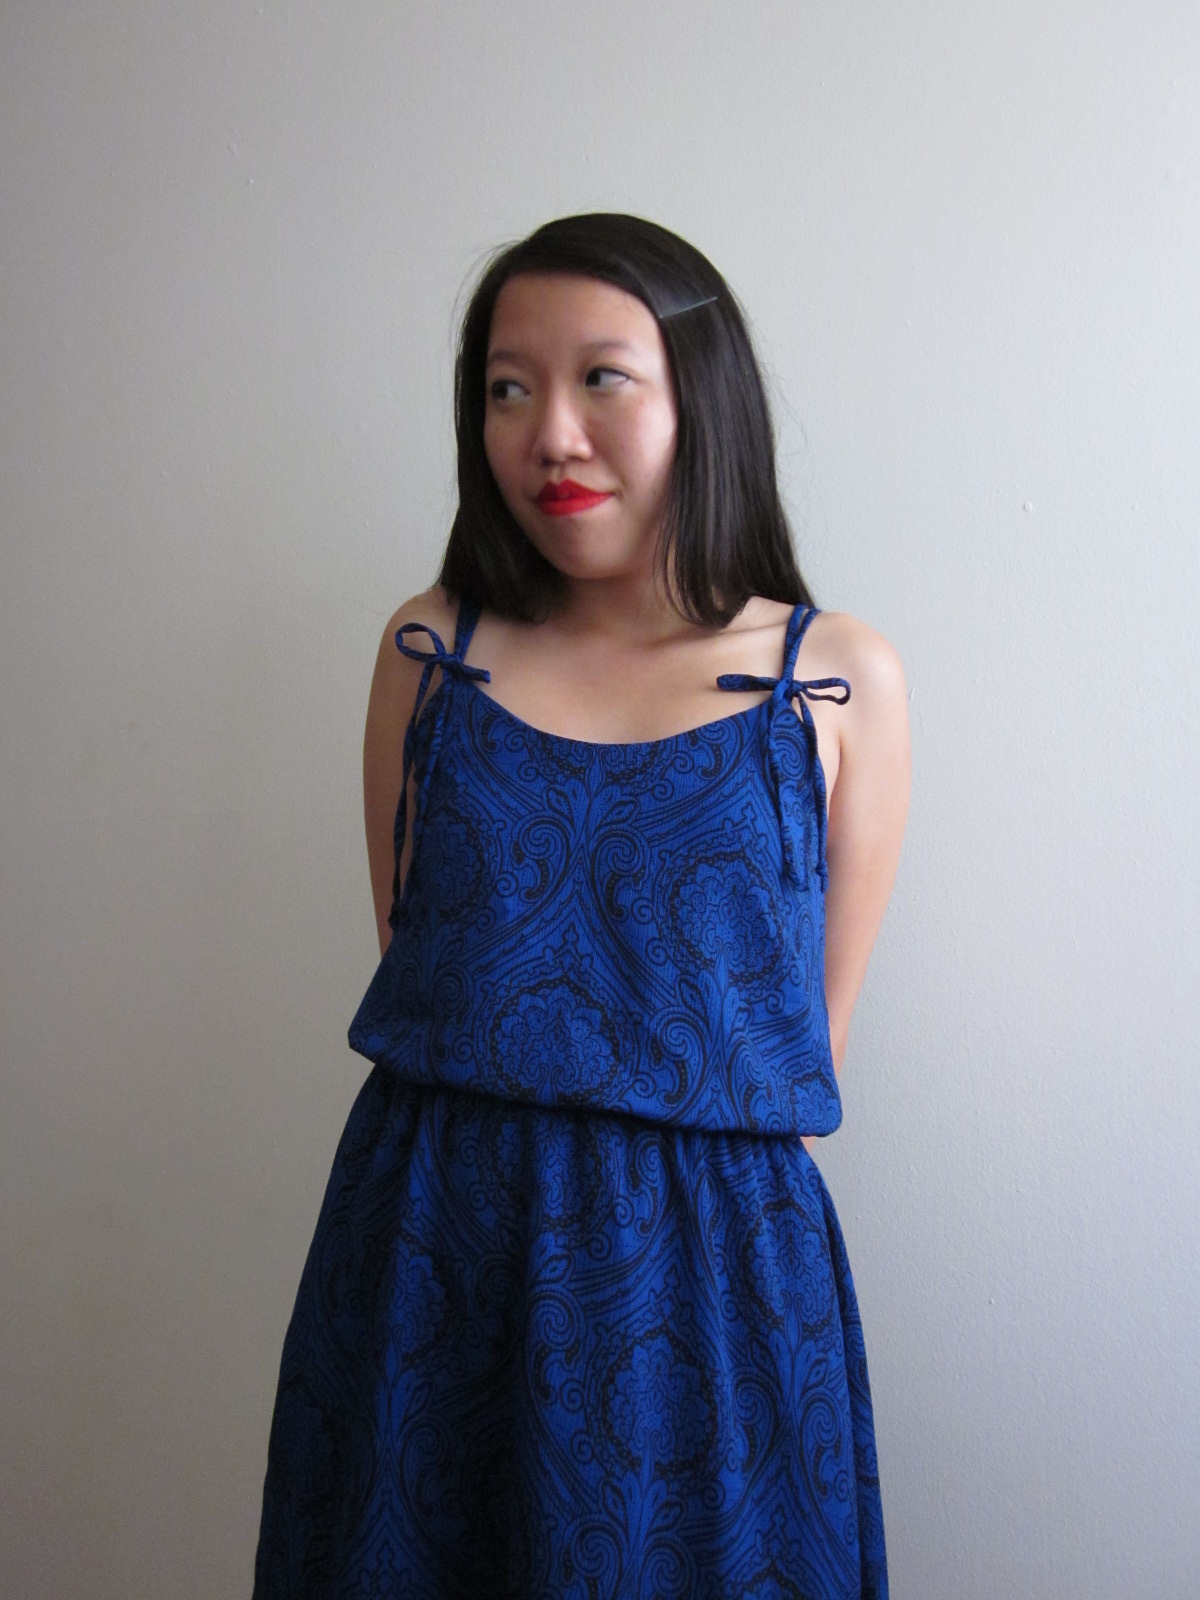
I did however alter the straps so they tie at the front using Caroline’s idea from one of her variations, which involved sewing both straps to the back and making a loop at the front. (She’s Tasia’s aide over at Sewhoalic Patterns, and yea she’s got the same name as me!) I guess one other thing I did was lop off a bit on the end of the ties because they’re too long for me otherwise.

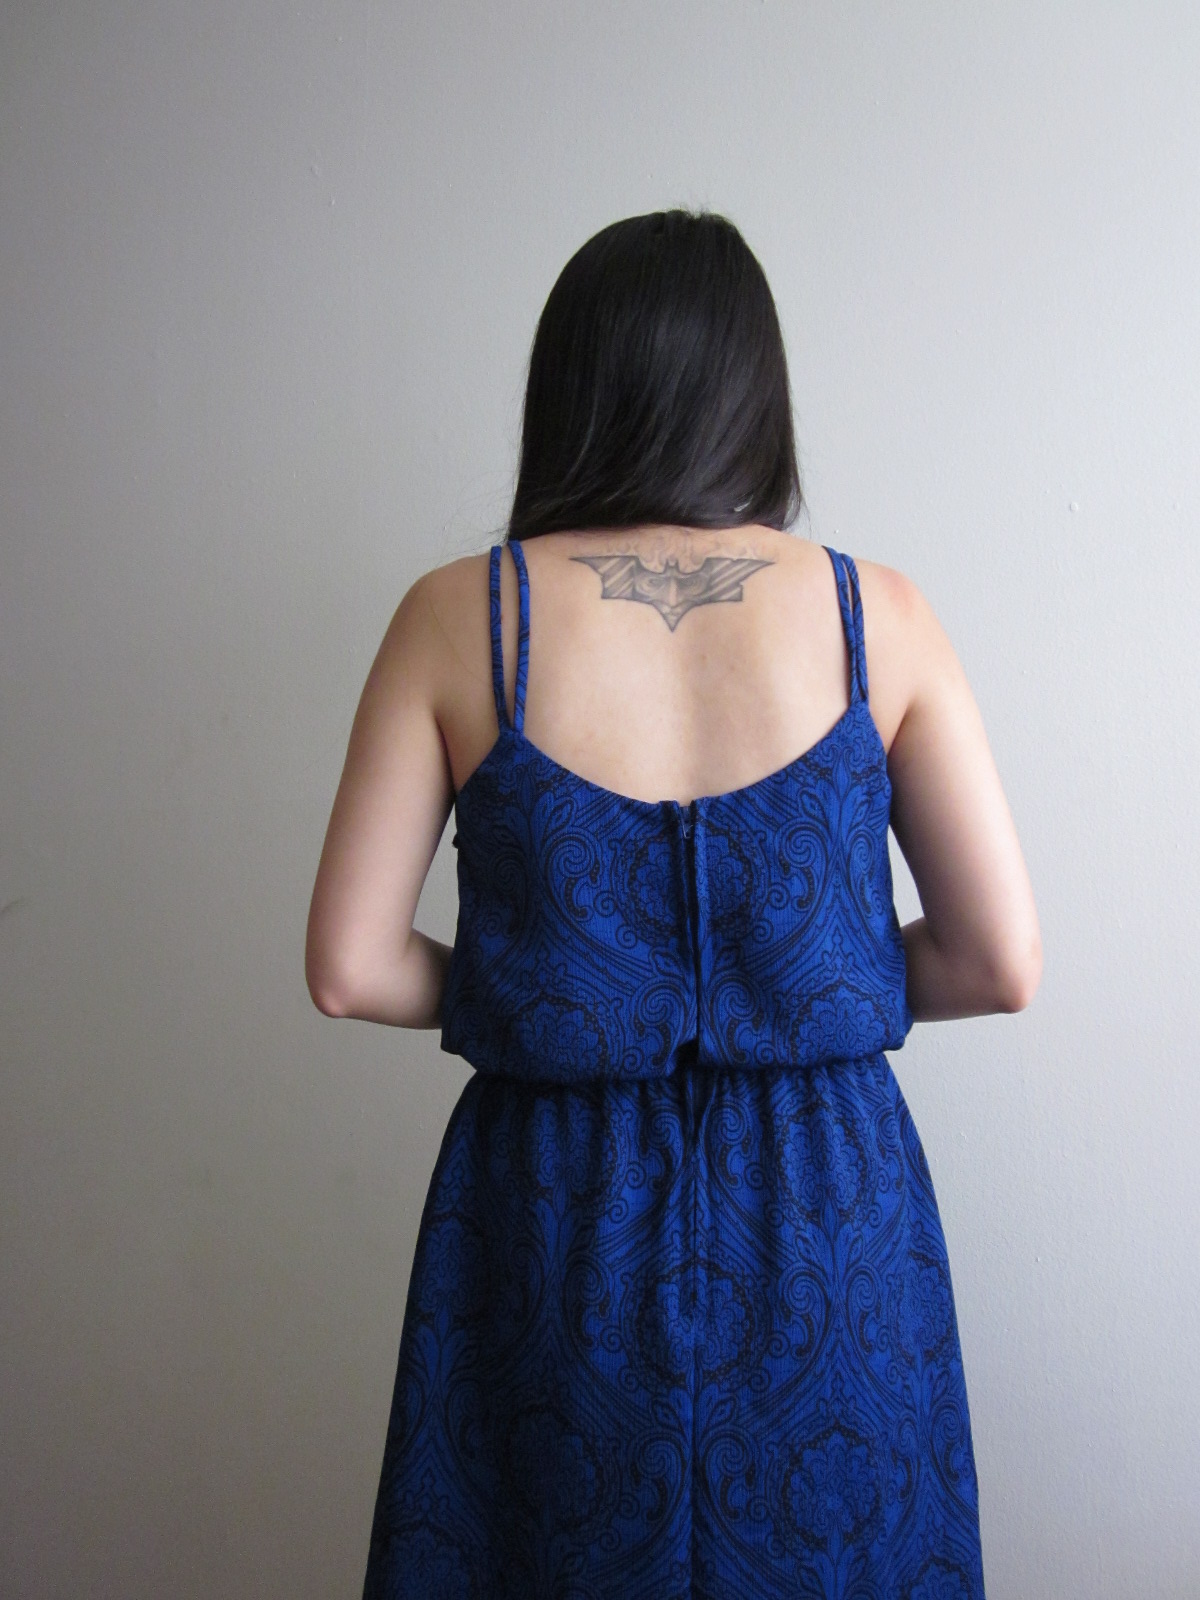
The fabric is a polyester crinkle fabric from Fabricland. It’s got such a lovely pattern! I didn’t try to match the pattern at the side seams but rather made sure it was centred down the middle of the front and back. I also took care to line up the pattern for the back seam.

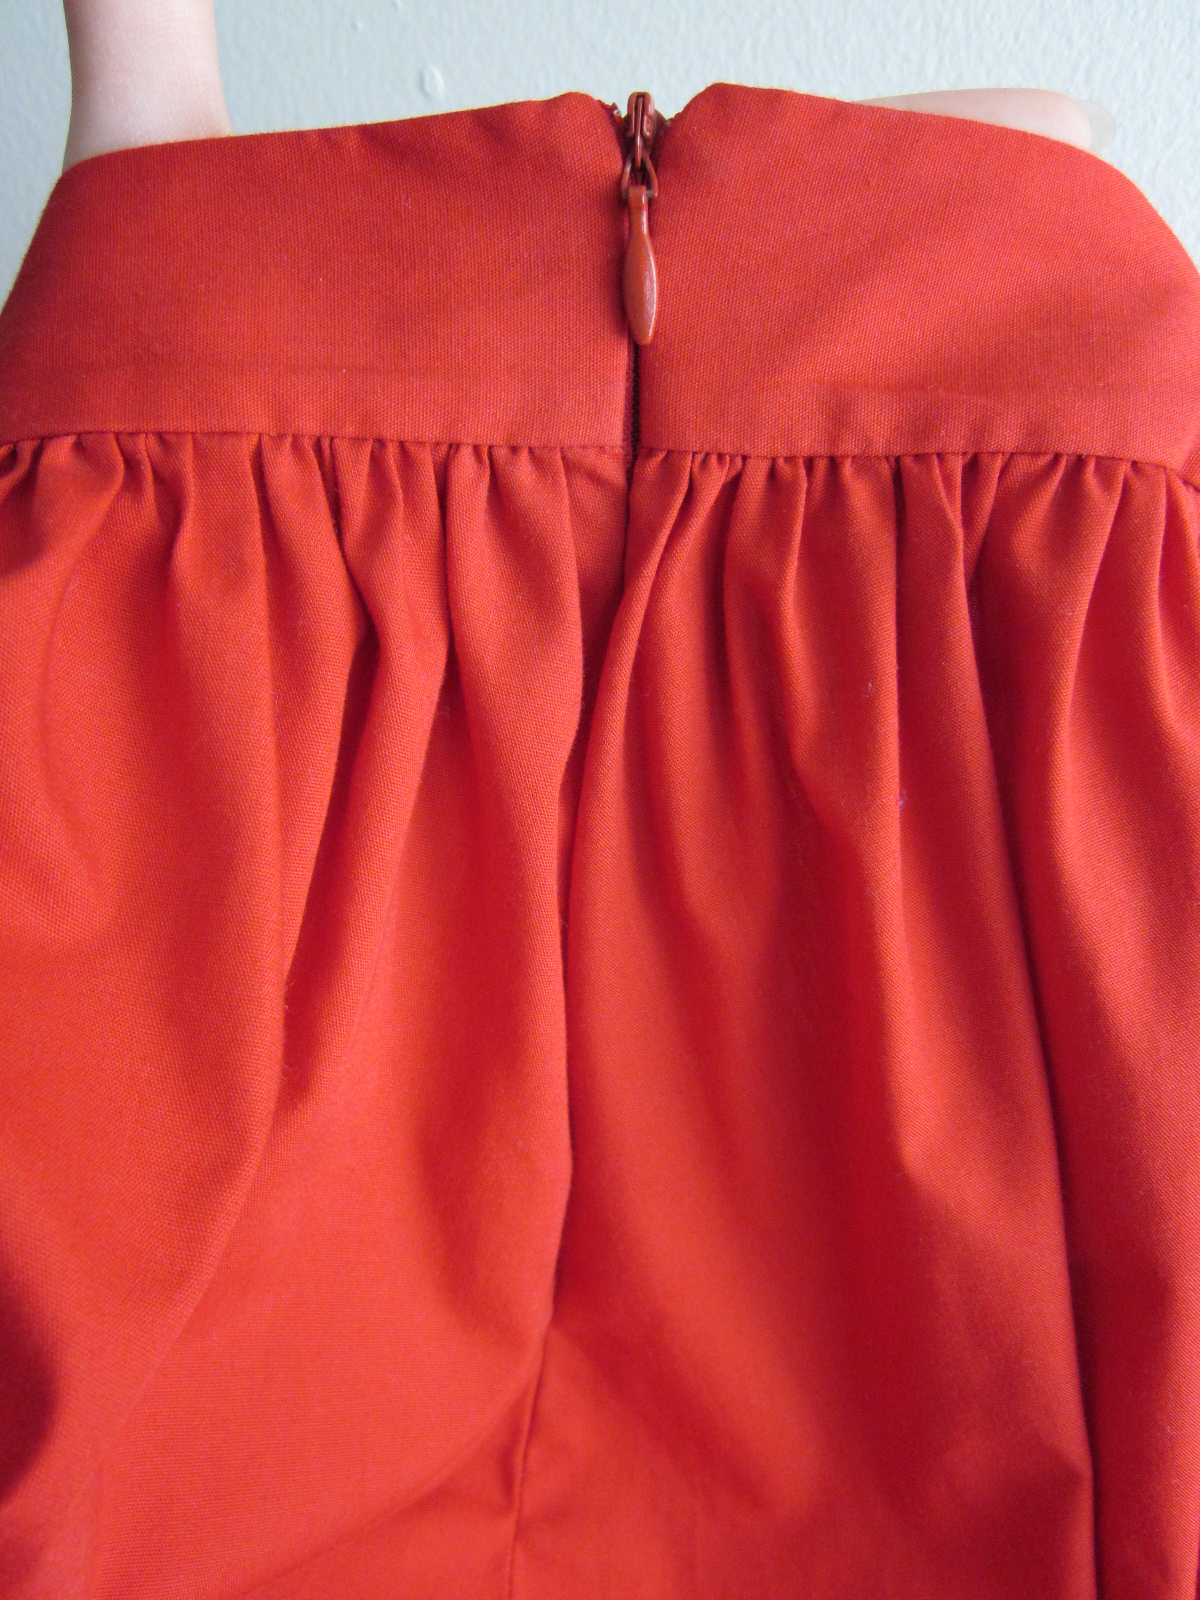
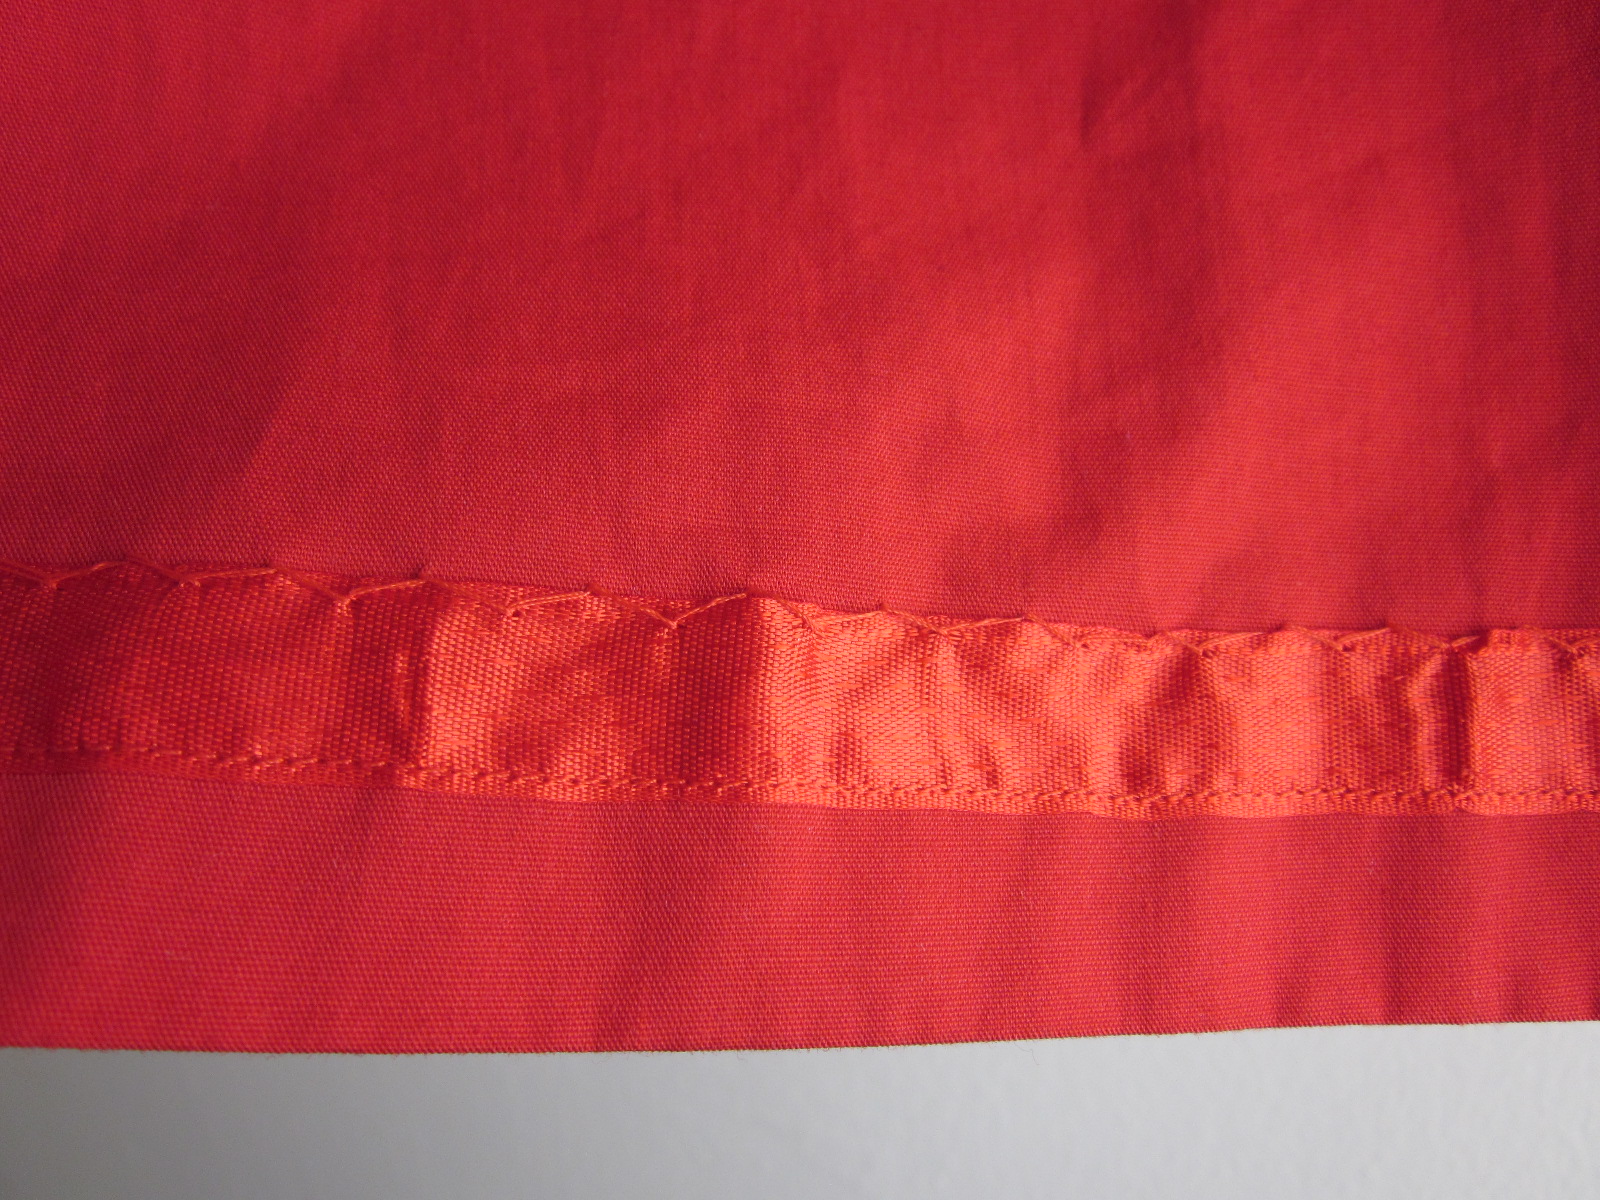
I used Bemberg lining throughout the dress and added a skirt lining even though I didn’t really need it. I used the lining method suggested by Caroline. I handstitched the entire lining down to my zipper tape though as I prefer not to have things flying around loose! Linings make everything feel so lovely and luxurious! Well worth the extra effort.

I am definitely going to get a lot of wear out of this dress. It’s going to transition well into autumn with a pair of tights. I’m warming up to the idea of having more wearable dresses with elastic at the waist. When done well, elastic waists don’t have to be tacky. I ate so much food today wearing this dress. Couldn’t have done that with something like my Lonsdale or one of my other projects!

What a way to kick off the end of summer — I’ve got a new dress and successfully participated in another sewalong.

I do have a funny story to tell about the Saltspring dress though…One day this summer a couple of weeks ago, I went to Spool of Thread to buy the pattern. When I go shopping for sewing related things, I have a laser focus and bounce from one thing to another in the store with blinders on. I take notes in my notebook and muse about future projects as I feel up the fabrics. I was pretty quick with my purchase since it was the only thing I wanted to buy that day.

So I go up to the cash register and the person working asks me if I was ready with my purchase. I said, “Yes. Just this pattern. I’m going to join the sewalong!” The employee at Spool of Thread says something like, “Oh, well the creator of the patterns is right here!”

I turn my head to the left and there is Tasia! Standing right next to me! She had been at the store earlier than I had been, purchasing fabric and I didn’t even notice her the entire time I was there until I got up to the register. My mind froze. Here standing before me was one of the local sewing “celebrities” that I admire for her talent and all the hard work she’s put into her own small business.

I tried to chat with her as calmly as I could but I was so nervous and felt like a buffoon. So Tasia, if you ever get to read this, I think you’re awesome and you’re as friendly in real life as you seem from your blog. That was the highlight of my week to get to meet you! Thank you for creating Sewaholic Patterns. It’s been great to follow along all these years through your journey and sewing your patterns has brought me great joy.


The Coco Top

So I made this top way back in June and finally got around to taking photos. I know my personal friends and family are always curious about what I get up to when it comes to sewing. So here it is!

It’s sewn from a Megan Nielsen pattern, the Briar pattern, which has a high-low hem and comes in a cropped length or a regular full length. I made the cropped length with 3/4 sleeves in a lovely blue and white knit fabric I got at Dressew. The fabric is a linen blend! It feels so nice and is the most luxurious knit fabric I’ve used ever. I’m afraid to get this shirt dirty in any way. It wasn’t very expensive either, it’s just that the linen makes it have such a great drape, weight, and texture.

You can see the back view here. It curves down longer around the back. I love the hem, it’s a great design feature and just oh so cute.

I must confess, this was the first time I EVER sewed with a striped fabric, let alone a knit striped fabric. I had a dickens of a time trying to match up the stripes but I think I did a really great job. I used Tasia’s blog posts on sewing a striped Renfrew top to help me along. They are a great online reference, I highly recommend them.

I think I did an alright job lining up the stripes. If you look closely, it’s not 100% perfect, maybe it’s 95% matched on. I did my best! I don’t think anyone else but me will notice it’s not 100% perfect and I’ve learned these days that you just have to let it go — nothing will necessarily be totally perfect.

Oh and look at my hair! The purple dye completely washed out ages ago and left me with this caramel coloured blonde. I’ve gotten so many compliments on my hair this summer. I’m so happy that I took the plunge to get it bleached and dyed in May. It’s turned out amazing and I’m going to keep it this way for a while. I’m going to need a cut soon and I’m thinking of getting a true ombre done to my hair as well. Either that or more purple dye! What do you think? Ombre or purple? Heh heh!

I have one more thing to mention…I named this top The Coco Top because it reminds me of the striped top Audrey Tautou wore in the film Coco Avant Chanel. I actually only just watched it last week for the first time and I thought it would be a fitting name for my shirt. Now I can feel like a French girl whenever I wear it, haha!

A Scarlet Skirt – McCall’s M6438

I made this skirt last summer for a “modern Velma” costume I wore to a Geeks After Dark event (more on that later). This skirt was a quick make and is now one of my favourite garments because of its simple versatility and because I can wear it to work!

The pattern is McCall’s M6438 which is a super easy skirt pattern that comes with four variations. I made view A but with a few modifications. I doubled the width of the waistband because I love the look of wider waistbands and I changed the zipper insertion method. I inserted an invisible zipper because I prefer this type of zipper and inserted it to look more like a ready-to-wear skirt. Here’s a photo:

The zipper goes up to the top of the waistband and I don’t have to fiddle around with sewing an overlap and then adding either a skirt hook and eye or button. I have nothing against overlaps on skirts or pants and love that look as well. But for this garment, I had a certain “vision” in mind so I skipped all those steps. It’s neat and tidy on the inside too.

I didn’t really save much time because I hand hemmed the skirt with seam binding and a catch stitch. Looks so tidy eh? Tasia has the best tutorial over on her blog.

Outfit details: The shirt was thrifted, the tights are from Dysfunctional Doll, and the shoes from Aldo.

EDIT: I wore this skirt to work today and one of my co-workers asked me if I got it at Banana Republic. ^___^ Nope!

Here’s a bonus photo of me as Velma or what happened to be a very loose interpretation of Velma from that evening at Geeks After Dark.

If you’re wondering what Geeks After Dark is, it was an event that would be held at The Cellar nightclub in downtown Vancouver about once a month or so and featured a nerdy theme each time. Star Wars, Disney, British Sci-Fi, you name it, they did it. There would be nerdlesque (which is nerdy burlesque), a trivia contest, costume contests, and then dancing part of the night away to “geeky” music like the Space Jam theme song and the Mortal Combat theme (techno remix!). It was one of my favourite things to do ever! Then the event organizers split apart due to irreconcilable differences and the new incarnations of Geeks After Dark are known as Geekenders and Mastergeek Theatre. I haven’t really been to these nerd events in a while but will probably go to Geekenders at the end of this month. It’s good to go dancing!

So there you have it, the cat’s out of the bag for the whole internet to see — I am a raging nerd. My friends already know this of course but I knew I couldn’t hide it from my blog for long. Nor did I want to hide it! I’ll have to do a feature on one of the costumes I’ve sewn later on.


Spiffy Elbow Patch Mending Project

My friend Victor asked me a while ago if I could help him mend one of his shirts. He had worn out the elbows in this blue casual button up shirt and was wondering if I could put elbow patches on them.

He had tried sewing the holes shut himself but as you can see, he does not quite have the skill to give it that professional finish. He told me he’d just been wearing the sleeves rolled up anyways so no one saw his “handiwork”.

So I undid his handiwork and surveyed the real damage.

I had to think for a while how I was going to go about this process. I came across this blog post: http://ohsnail.blogspot.ca/2012/02/how-to-make-elbow-patches.html

It was very informative and was the tutorial I liked the most. You see, I was wracking my brain trying to figure out how to finish the edges of the elbow patches. Use a turned under hem all around? I had a feeling it wouldn’t be as clean a finish on the oval shaped template I was using. For a square, rectangle, or more angular patch shape, that might be just fine.

The tutorial I found is ingenious though – make the patch out of two layers of fabric and sew them right sides together. Then leave a gap so you can flip it inside out after pinking the edges and iron that sucker down so it’s perfectly flat and oval. Then hand stitch the open gap.

I then hand stitched the oval elbow pads to the shirt with my trusty uneven slipstitch. I couldn’t use my sewing machine because the sleeves are much too narrow to jam into it. Plus the hand-sewing looks just lovely. I also used a whipstitch on the inside to sew the hole down to the patch. You can’t see it on the outside because I took care not to pierce the upper layer of the patch. I preferred the slipstitch to the blanket stitch for a more modern look. So many of the patching tutorials I came across recommended the blanket stitch. The blanket stitch is a little too rustic or crafty looking for my friend’s sense of style.

Now I know I keep mentioning this slipstitch of mine and for those not in the know, you may be wondering what it is. I scanned my Reader’s Digest Complete Guide to Sewing (I have a pristine copy of the older edition from the 70s, it’s amazing!) and provided the section on slipstitching below. If you click on the image, you can see the full size scan.

I learned how to do this hand stitch back in high school. It is one of my most used hand stitches because if you do it right, you will have a truly invisible and sturdy seam. I often use it to join the inside of the waistband or a facing to the interior of a garment for an invisible finish and prefer this to stitching in the ditch whenever possible. I prefer hand stitching for finishing off my garments to give it the nicest interior I can. Hand stitching is also such a soothing task and I’ll often sit and listen to Ted Talks or documentaries for a quiet moment to myself.


Berry Sorbetto and Purple Hair

I took some pictures today of the top I made last summer. It’s a Colette Patterns Sorbetto top and the pattern is free from their website.

I have kind of a silly expression on my face but it’s because I had spent some time taking photos of myself again today. I still think it’s a bit of a strange experience running back and forth to my camera on the self-timer mode which is set up on a tripod. I’m getting used to it though and have better knowledge of how the lighting works in my apartment now after all these blog posts. Here are some more “model-like” photos, aha!

The pattern is super easy, I think it only took me a couple of hours to sew (not including adjustments). This was meant to be a wearable muslin as the fit isn’t perfect. I cut a 0 and that turned out to be a smidgen too small in the bust (I know what you’re thinking, too small for my teeny bust?). The armholes were also waaaaay too tight and I can’t remember how much I trimmed all around but it was probably about 2 cms. The bust darts are too high and the length is a bit short in the torso unless you’re going for a cropped tank look. Now if this was meant to be a wearable muslin, what possessed me to add piping and heart shaped buttons? I can’t remember but I still think the top is cute despite all these issues with the pattern.

The armholes are always too tight on Colette Patterns for me, I don’t know why because I’m such a thin person all around. I guess their size 0 is teeny-weeny if it doesn’t even really fit me properly. If I made this top again, I would cut a size 2 or 4, make a narrow shoulder adjustment and cut a deeper armhole or make the straps of the tank longer. This might also fix the bust dart issue without having to move the dart down.

The fabric is just a cheap poly/cotton broadcloth from Dressew. The piping and bias tape trim are also from Dressew and the buttons I found at Fabricana. So it was an inexpensive make all around.

Enough about sewing though. I dyed parts of my hair a purple-pink last Monday. Only the back sections of my hair are dyed purple-pink for several inches at the tips. You can’t really see it in the photos but it’s there if you look for it.

What possessed me to dye my hair? There is a regular patron at one of the branches I work at and she is in hair school at the Vancouver Hair Academy right now. She’s a lovely patron and she needed some live models to practice her skills on. I agreed to be a guinea pig for her and she gave me a free hair cut/trim and 30% off the dye job. I’ve always wanted to dye my hair so this was a great opportunity for me try it out. This is the first time I’ve EVER dyed my hair. Everyone at the hair academy was excited that I had what they called “virgin hair”.

It took about 4 hours but the patron was so nice, she brought me a lunch and snacks and drinks! The instructors at the hair academy are also quite awesome and check each step before the student is allowed to go further. This is why it took so long since it was also a learning environment. I’m pretty happy with how it turned out and when it starts to fade I’ll buy some of my own purple dye to freshen it up.

I love dip-dyed hair!

Related Posts Plugin for WordPress, Blogger...